A place for me to display some of the varied projects that come out of my shop, as well as to "talk" about some of my experiences working with wood.

Tuesday 22 January 2013

Hand Tool Bench-on-Bench (aka Moxon Vise)

During the building of my Toolchest, I spent quite a bit of time hunched over the bench paring out dovetails that I had cut. The next day I could not bend my neck and knew I had to fix this before I did my next hand tool project.

Moxon's engraving showing vise on front of workbench.
Many builders have played with the design of the Moxon vise which by most accounts was first found in Joseph' Moxon's landmark book on woodworking from 1678.

The recent renaissance of hand tool interest has resuscitated interest in the Moxon vise and many woodworkers and manufacturers have taken a stab at their interpretation of the Moxon vise.


I have looked at most of the designs out there as well as the many individual attempts at building this vise and developed a design that would work for me. I knew I wanted to use my end vise dogs to attach it to the bench and I wanted a small bench-on-bench work-surface, rather than just the two jaws like many designs. I asked my machinist pal Joey to use the same design he used for my end vise handle to make some wheels which would work with some threaded rod that I would build into the vise.

Wood Parts Layout before final assembly


I also built a mock-up with some blocks to test the height which would be best for me; I had read the the ideal height for this work is 4" below your elbow; after trying several heights it turned out the 3-3/4" below my elbow was the perfect height - the rule of thumb would likely have been fine!

Gluing the bench-on-bench "top" piece
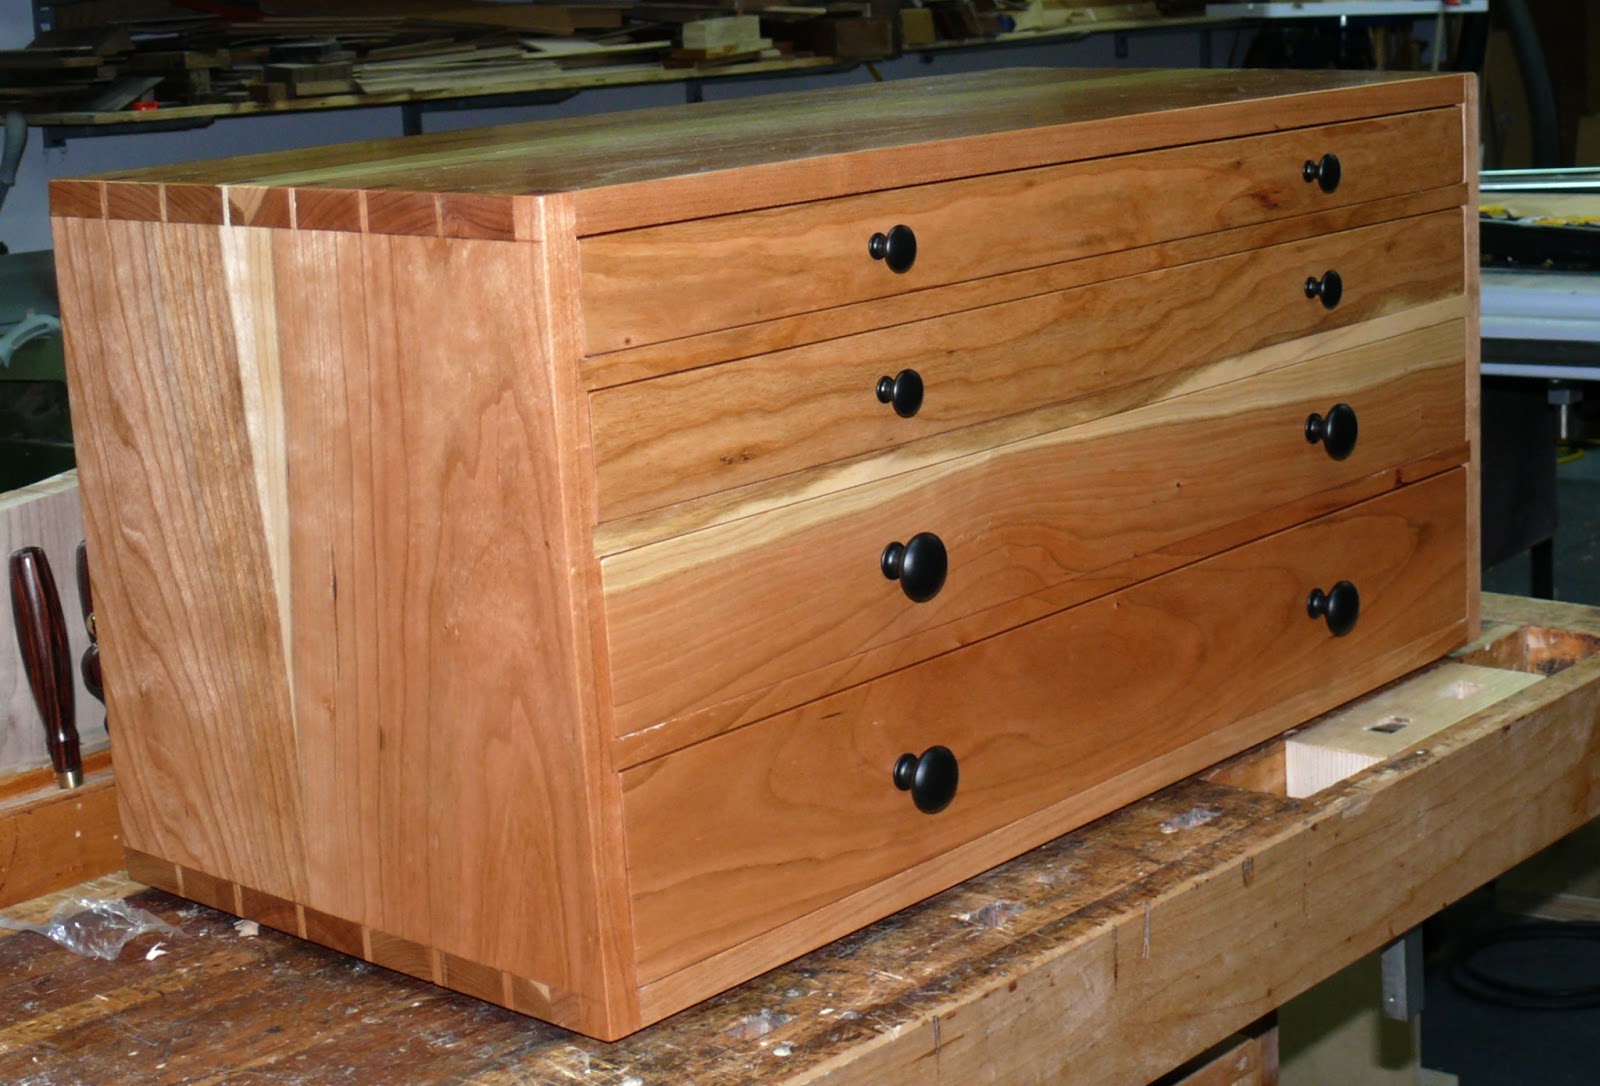
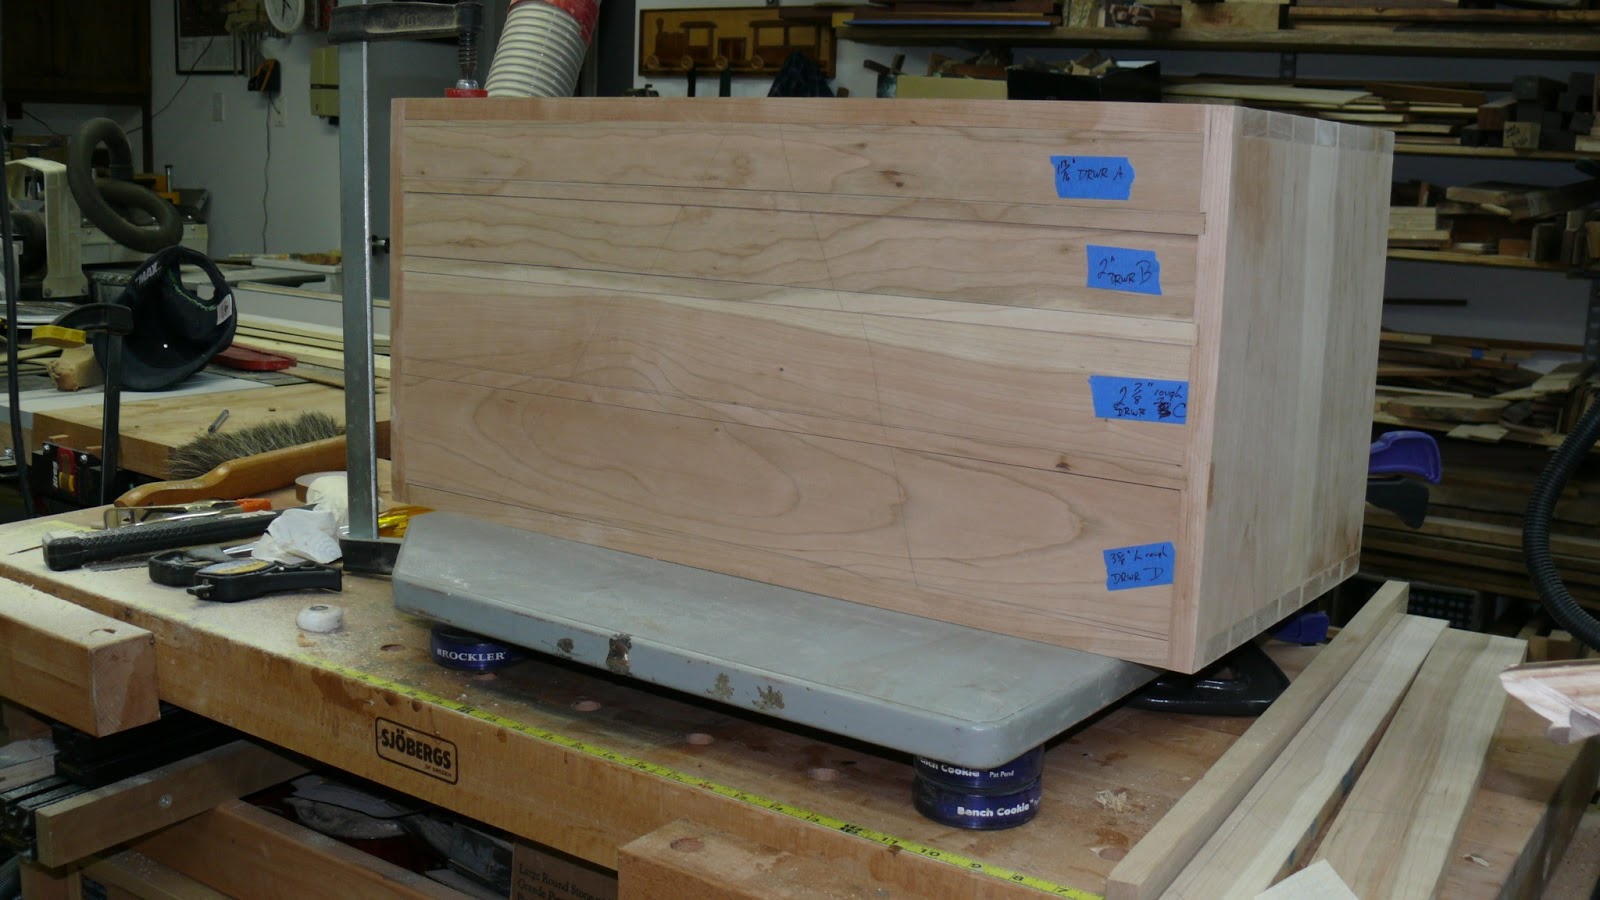
Picture of vise in use making some drawer sides with prototype wheels.


I used some Maple that I got from the same mill as the birds eye for my Dad's rocker and built the various components to build the vise. The picture below shows the finished vise. A few test cuts on the new bench have proven its going to be very useful going forward. Since I have already been asked, these wheels are turned from 5" 4140 steel bar stock and are very heavy.

After using the vise on a couple of projects, one thing that has frustrated me is the the chop(front jaw) does not move when I remove pressure from the vise - I am looking for a small spring set-up which will open the jaws for me.
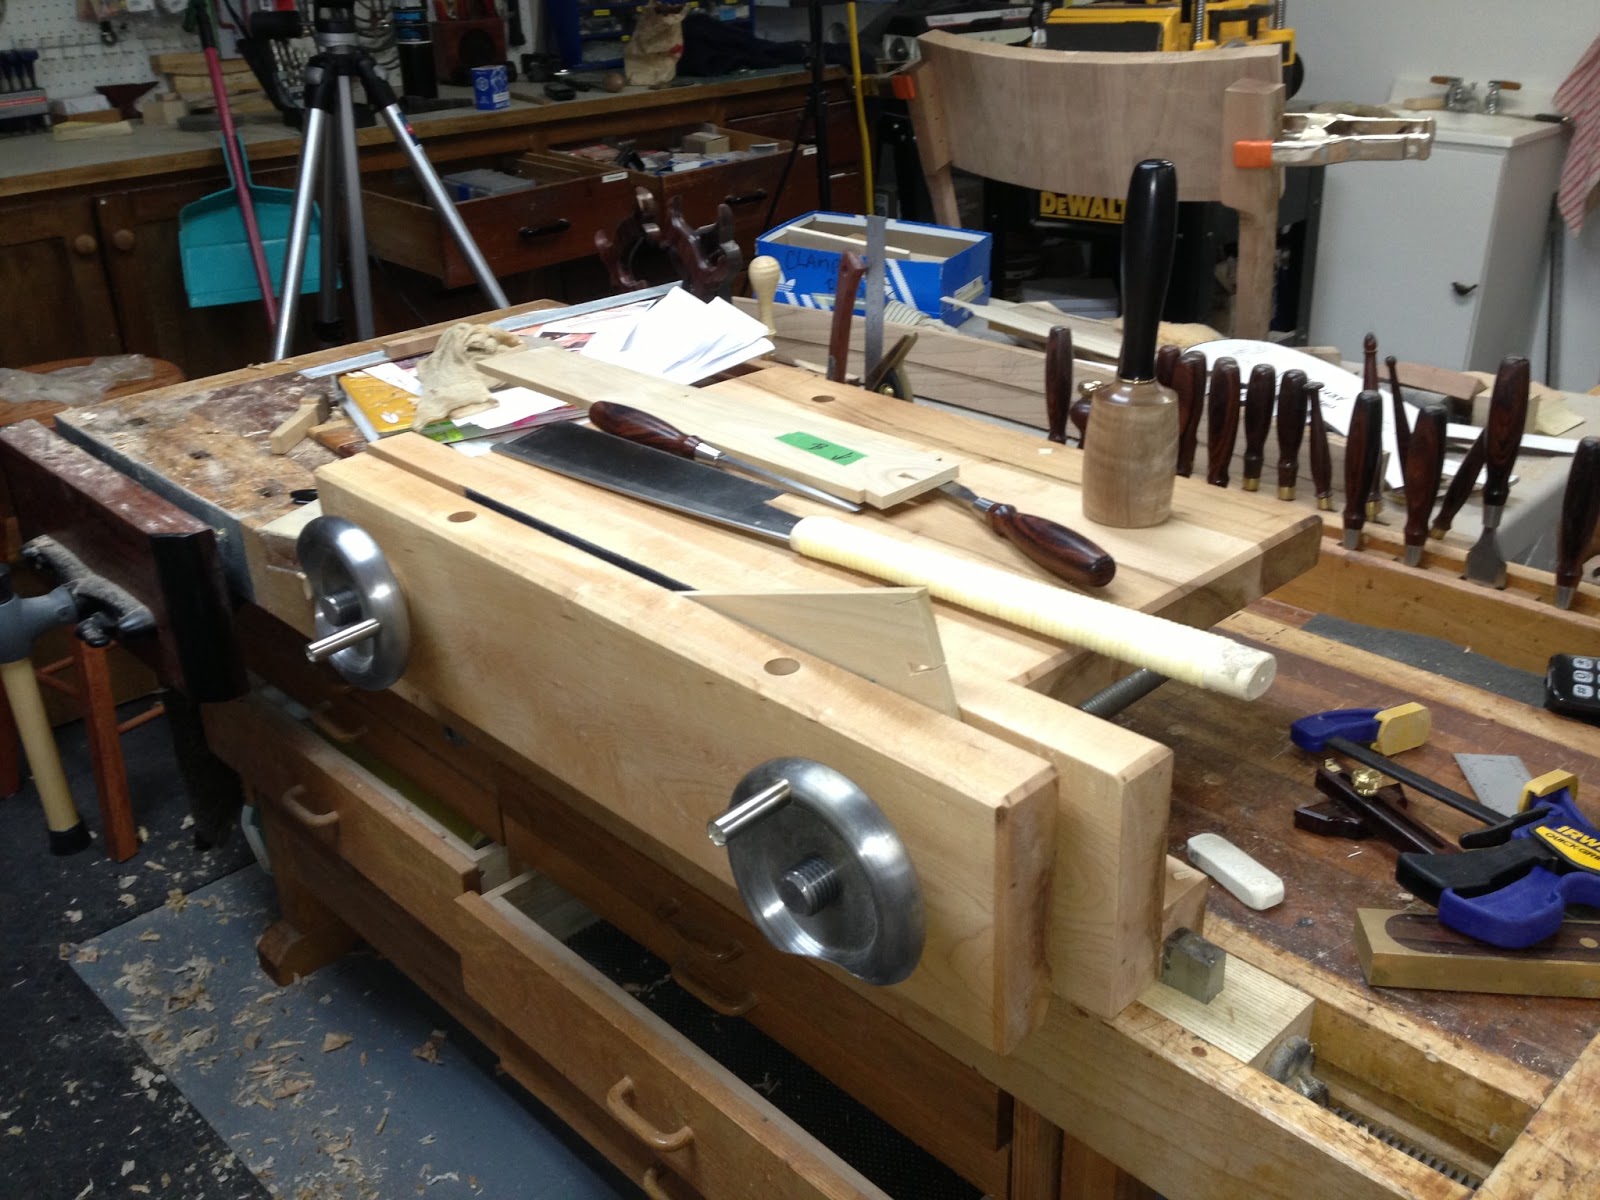

The finished Moxon.

Wednesday 9 January 2013

NBSS / Tommy MacDonald Tool Chest Complete! Plus Tool Porn

Thanks to many for the kind comments (including a FaceBook share from Tommy himself) on my first post on the Tool Chest; I am glad others are interested in this project, it inspires me to keep going with this blogging thing...

The first blog left off with the case finished and ready for some drawers. The next step involved my very first attempt at half-bind dovetails which have been a trademark of fine craftsmen for centuries. The drawer bodies are made from Southern Yellow Poplar which is harder than the pine normally used but still soft and light enough to work easily. The drawer bottoms are 3/8" bookmatched resawn poplar with tapered edges to fit in the groove but keep the strength in a drawer that large.

A few finishing touches I have put into this special project are the black cast iron pulls and the green leather drawer lining which add a real richness to the piece. Enjoy the build shots.

Using my David Barron dovetail gauge to cut the drawer sides.

Test fitting the drawers to ensure they glide effortlessly


The drawers with a coat of finish on them, the insides
are not finished.


The finished case and darwers, just 5 more coats of Deft natural to go.

The ash ship-lapped back is screwed on
The finished cabinet with cast iron pulls installed!

 And now for some Tool Porn

This new tool chest allows me to store some of my nicer tools in a dust-free place - they will all be used just as much, only without the dust!!
Measure three times, cut once, measure again!

The plane truth!

Saws - all??

A plane brown wrapper!
Thanks for viewing, this has been a fun project for me.

Sunday 6 January 2013

Tommy MacDonald inspired toolchest - Build Part 1

I have been a big fan of Tommy MacDonald since he hit PBS 3 years ago, and fully support him in carrying the torch for Norm as the promoter of all things wood on PBS for the current generation.  I have to admit that Norm inspired me to get into woodworking many years ago, long before I had the tools and the space to make anything.

Tommy and his Toolchest
I had the occasion to meet Tommy this fall at Woodworking in America and had a chance to chat about his show; he also did a little demo/chat on his  toolchest project which appeared in this season's episodes. This toolchest however has been one of his signature pieces from the beginning and the build along for the original has been on his site from the beginning. I have always wanted to build this project as I think it is important for every serious woodworker to build a toolchest sometime in their lifetime. This design features many elements which make it a challenge for even the most experienced wood butcher.


Wood layout, couple of nice pieces of Cherry need to be
oriented to maximize the nice sapwood stripe in the joint
This project is my first real attempt at dovetails for case construction and like most folks a little intimidating, and unlike others, I am not going to use a lot of time practicing cutting dovetails on firewood - my approach is to dig right in. I used David Barron's dovetail jig which I have to admit is the best jig I have tried for cutting dovetails and is difficult, even for me, to screw up.


My design has a few departures from Tommy's original, because of a screw-up (insert swearing here) the front divider strips are not dovetailed into the front of the case - the dadoes look just fine - really they do...  I  have also altered the drawer layout to give me full-width drawers on the top, this better suits the things I want to store in this chest.

Following are a few pictures from the build, the case is now complete and just need to finish cutting the drawers and fitting them which takes quite a bit of time - test-fit, plane, test-fit again, repeat as necessary. Remember to click on the pictures for a closer look.


All the tails cut on the case sides


Using David Barron Jig to cut the tails on the case top

Test fit of the first corner - doesn't suck!


Case sides with dadoes cut for interior partitions, cleaned up
with the router plane
Mother of all glue-ups to ensure its perfectly square

I am testing out a prototype joinery float from Liogier rasps from
France, it makes quick work of the these faces right off the
table saw.

The interior dividers all ready for glue-up, I used oak for these
as I had quite a bit laying around.
Layout of the front pieces was critical to get that grain
flowing across the two boards. the narrow pieces are the
divider pieces that fit between the drawers.
The dividers test fit with cherry fronts added, ready for trimming.

The front dividers glued in place and the drawers fronts
 friction fit into their openings creates a pleasing look.


The case with a coat of finish on it ready for some drawers! the case is on its back, the long
face is the case's top.