A place for me to display some of the varied projects that come out of my shop, as well as to "talk" about some of my experiences working with wood.

Monday 16 December 2013

As the Wood Turns

I have been quite busy lately with travel and have been challenged to finish the Christmas presents that have been ordered by friends and family. I am pleased to say things are done and this past weekend I have been doing a little shop project for myself.

Blue Spruce (USA) Cocobolo Handled Chisels and Mallet
(you may recognize this shot from last year's tool calendar)
A while ago I decided I wanted to make a set of handles for the new Veritas PMV11 line of chisels that Lee Valley brought out last year. Most of the user chisels I have are made from various exotic handle materials, and I felt these should be no different. A few of my current users are to the right.
 
The Blue Spruce set is my main bench set that stays in my bench tool slots and I have the full range including the beveled, fishtail and marking tools.
Harold & Saxon (Aus), rippled blackwood bench chisels and
Australian ironwood mortise chisel set. These boxes allow them
to be stored and kept organized when being used, the chisels are
held into place with rare earth magnets.

The Harold & Saxon bench chisels are the ones for prolonged dovetailing sessions. made from one of the hardest tool steels in the world, I can usually make an entire project without feeling the need to re-sharpen.  The mortise chisels are very substantial and take a serious licking and of course stay razor sharp throughout the abuse.

BRW Blanks - aren't they precious??
The Veritas chisels' project commanded some nice handle material. I really wanted Ebony, but after searching high and low was unable to locate blanks of the requisite size, so I looked for inspiration elsewhere. I recently scouted some local old stock Brazilian Rosewood for a buddy who was shopping from afar and needed eyes on the prize before pulling the trigger. He did not buy everything they had, so I picked up a couple for myself. These were old stumps that had been harvested long after the trees had turned into guitars elsewhere; the price was right and these blanks all had the awesome figure that we love in BRW and the stump areas have more figure than normal tree sections - I was in love...

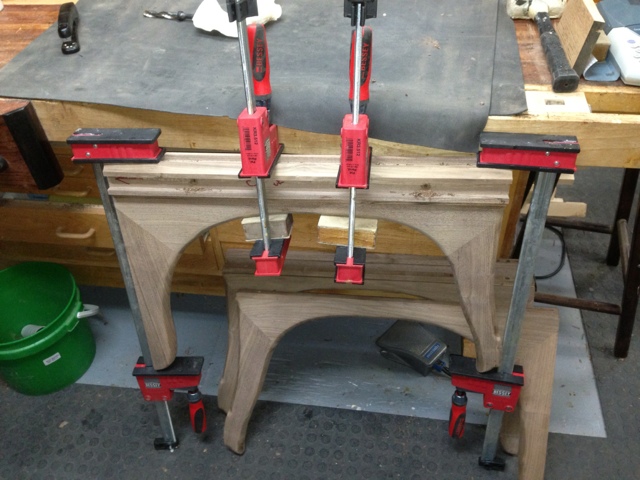
Once I cut into the larger piece the figure amazed me and the turning project was on. The challenge for me was getting the handles' shape to match the originals and for them to be close to identical in shape - lots of stopping the lathe and checking with the caliper to make sure everything was in spec. I chose not to shape the flat that the originals had on the handles, as these will be used in a box like the H&S ones above.

I also managed to score a couple of advance copies of the 3/16" and 1/8" sizes to make a complete set in one go. I have been advocating for the 1/8" size for a while; I understand they are VERY hard to make which is why they are not that common. Having used this one for a couple of weeks now, I think Veritas has nailed this and I would strongly recommend this for almost any type of woodworking - one of those tools you don't think you need, but cannot live without once you have had one. I have a 3mm one I bought from a luthier supply house many years ago which is on my wall rack, ready to be used on every project.

Okay, okay, enough pontificating already, here's the money shot:

Brazilian Rosewood Veritas PMV11 Bench Chisels (L-R 1",3/4",1/2",3/8",1/4',3/16",1/8")

Thanks to my friends at Lee Valley for helping out with this project; I hope I have done their work justice.

Richard


Monday 14 October 2013

Tool Porn Update - Plane and Spokeshave handles

WIA is only 5 days away and very much looking forward to seeing some old friends and make a few new ones in this great world of woodworking.

I had promised a good friend of mine some new handles for his Boggs spokeshaves and spent the weekend turning a few.  He sent me some wonderful Blackwood and Rosewood to make the handles from. Here's a quick iPhone shot of the finished handles.

I will be delivering these on Friday in Cincinnati.


I was making a new set for my two Lee Valley shaves as well and they use a different attachment method which I did not like. They used a small hanger bolt with a 1/4"-20 thread to attach to the shave. I did not think this gave me enough material in the handle to be secure. I am sure it was fine for the original bubinga handles but some other handle materials, not so much. The Boggs shaves attach with a 1.5" long 1/4"-20 bolt with a hex head for an allen key. This put about 1-1/8" of material in the handle which was more like a tang and I felt added more strength. I bought some threaded rod and cut some for myself and inserted them into the wood with a double-bolt setup. Here's a few process shots on the LN ones, but I ended up using the same process for the LV ones.


Tapping the 7/32" hole for the 1/4"-20 threaded insert

The threaded inserts placed in the blocks. Important point here is that they
are not glued in place; once they are installed in the spokeshave and grain aligned,
they will be glued - we must align our grains...


Stage 1 of turning, setting length and diameter, before the final go

The finished Lee Valley Spokeshaves:

Honduras Rosewood and Cocobolo
I also received my newest plane from Konrad Sauer, its a K9 - that is Konrad-speak for 9" long plane. This plane is made from the most spectacular Desert Ironwood I have ever seen. Not much I can really say about this, the picture will just have to speak for itself:


Sauer and Steiner K9 in Desert Ironwood

Monday 7 October 2013

New Headboard for Oldest Son

The Finished Piece!
My oldest ask a while ago if I would build him a new headboard for his bed; he had an idea what he wanted, however was not entirely sure. There were many emails and sketches back and forth working out things until a final design was reached. He did not want it to look too "factory" made, so the challenge was adding an element to make it more casual without becoming too primitive. I tried various wood options for the slats which had to be horizontal and finally settled on some local cherry boards that came from my Dad's old homestead - these boards were just one step above firewood, and a small step at that! Careful thicknessing on the planar and then the thickness sander was the only way I could get usable boards without massive tear out and knots blowing up. The final product was worth the effort as these boards were a lighter colour and heavily figured with knots and lines which gave him the look he was after - relief!!

Here's a few build shots:

Cutting the mortises for the cross-members, 2" deep. My story stick
on the right and various chisels to get them perfect. Of course this is the most work
and is the most important part of the build - yet 100% invisible when complete.
Cutting shoulders on the bottom cross-member with my new Lie-Nielson
Tenon saw - like corn though a goose!!
Test fit of all the mortises and tenons to ensure its square and solid.

Tuesday 24 September 2013

Maloof table finds Loving Home


The table is finally complete, 7-8 coats of Deft danish Oil and its ready to move into its long-term resting place.


Finished table gleaming in morning sunlight.
This spot is under our back window which looks out onto the backyard where LOML and myself sit down to eat and talk about our day. A few pictures and an update on the chairs.


Closeup of the base showing the ingenious joinery,
Maloof was inspired by tree roots in the original design.


Another angle showing entire base.

A couple more construction shots which did not make the cut before:

A complicated glue-up for the legs, the dowels inside keep everything aligned.

Cleaning up the groove in the centre post with the router to ensure joint line disappears.
This is what makes the base look like one piece when it is done.

And where am I with the chairs for this table? I had a lot of head scratching to do in order to come up with my final design for the chairs and I am still not there. Building the chairs is the easy part, turning them into a gorgeous flowing piece of art takes the time. I am almost there. Lots of time was spent shaping the transitions of the joints and finding a way to join these elements to one another. I took advantage of the nice weather over the weekend to do some carving outside; both to deal with the dust and the oblique lighting helps the refinement process.

Three-quarter view

Side view showing my unique arm treatment - almost there!!

Wednesday 11 September 2013

Maloof-inspired Table nearly complete

The chairs I have been working on still require some shaping to be complete. In the meantime I have been working on the dining table to go with the chairs. It is another Scott Morrison design and the finished table will be 40" in diameter.

Here's the top in the final smoothing stage, this is from some nice wide walnut boards.

The construction of the base is a cool design with a neat way to attach the legs into a monolithic piece.
A rough fitup yo make sure everything goes together. Each leg is 3 pieces mitred together before cutting, reinforced with dowels across the mitres.

The centre post has a dado cut into its length on all four sides. Each leg has a matching tenon for its length and once glued up provides a very solid piece. The exposed corners above become a cove to blend the legs into one another, completing the organic look.
One leg at a time...

All glued up. The leg parts have all been routed to give a round look, the foot area needs to be shaped and lots of sanding to blend everything together.

First coat of finish on base!!

First coat of Deft on the top, comes up really nice.

The finished table needing a few more coats to be done.  Time to get back to chair-making!!


Thursday 29 August 2013

A must have tool that does not cost a mint!!! Binding Tape


Lots of binding tape to to hold binding in place while it cures. 
Last year I sent a note off to Rob Lee at Lee Valley and suggested that he should carry an additional product – luthier binding tape. Myself and many other luthiers use binding tape to hold on pieces of binding for a guitar body until they dry. Rob checked with one of his staffers who is also a luthier and it was “oh yea, great stuff, use it for lots of things!”.


A not so guitar-based use of the tape for home jobs.


In addition to its intended use, binding tape has many other uses in the shop and I have used it on many of the other projects I build. The issue for the non-instrument builder is buying it from a non-luthier supplier. This was exactly the problem Rob Lee ran into with trouble finding a supplier for this product. Looks like he made it work!


Now if you look at the first picture of the guitar, that binding tape is paper based and looks sort of like masking tape, but it is in fact quite different, and so is the 3M Binding Tape. Normal masking tape fails miserably in this application; as you apply the tape to the edge of the guitar and use the tape to pull the binding tight and fasten the tape on the top – regular masking tape tears or breaks almost every time. Binding Tape on the other hand stays intact and allows you to use the clamping force of the tape to position and hold it in place. Many builders use surgical tubing for this step – I have never been able to make it work for me.


While the tape that Rob found is not what I am used to buying from the luthier suppliers, it is refreshingly, maybe, just maybe, better. I bought a roll the day they released it on the website.
The tape I am used to using is stiff and very strong, both good attributes in binding tape, however this 3M tape is both of these things as well as possessing some elastic properties the others do not. This is a very good thing, so if you stretch it tight, it actually pulls tighter when you release it creating an actual clamping effect, better than the holding effect of the regular stuff.

3M Binding Tape in Action!
Why should you care? This tape is simply indispensable in the workshop and home improvement arena. It works where clamps do not, around baseboard corners, closing casing mitres, or for hundreds of different workshop glue-ups. As in this picture, edging is an excellent application for this tape, with no clamps needed and the tape does not leave residue on either finished or raw wood – get yerself some real soon!!


Monday 19 August 2013

Starting to Look Like Chairs

The chair project is moving along with considerable progress in the last few weeks.  While I have two sets of plans and templates for this chair, it has evolved into my own design with the templates used for joinery layout and geometry only.

New insert in place.
With my Veritas fence and hold-fasts installed.

One thing that was holding me up was the router table. My original Jessem had developed a hump in the middle of the metal plate which I think must have been there all along. after months of run-around by Jessem I finally ended up buying a new router insert as they could not help me at all.


This meant a new router top for my tablesaw as the new plates are the new industry-standard insert size. I made a new top from a couple 1/2" baltic birch pieces laminated together and covered with laminate. I used the Jessem template to rout the opening, added a few t-slots and I was back in business.


Back to Chair Building

Here are a few pictures to show the progress as things moved along.

The seats with the joinery cut and the front legs test-fitted.
The holes in the seat will define the depth for me in the carving phase.

Two hours from the previous picture to this point.
The seat is rough-carved, ready for some assembly.

Test fitting of the front and back legs, as Norm would say -
"ready for some assembly".

Before gluing the legs have been rough shaped on the spindle sander,
to make less work carving on the assembled chair. Here the back legs
are being glued on.

As I mentioned in the last blog, I was fretting over the arm design.
I do not favor the traditional style so set about coming up with my own.
This picture shows the original in blue dashed lines and my freehand
sketch of the one I want to use. A little flatter and less dramatic.
The actual shape would be refined on the chair.
The arms rough shaped, glued and screwed on,
Ready for some serious grinding and carving work.

The backs glued and screwed in place, ready to remove all the
bits that don't look like a chair.

Here's where I am at this point. I went with a round-over on the top of the crest rail. A large radius curve
on the tops of the arms, and likely rounded on the bottom edges (TBD). All the transitions have been rough ground and ready for some refinement work. many hours of  rasping and sanding yet to go!


Monday 29 July 2013

Maloof-inspired Dining Set Begins!

Maloof Low-Back Dining Chair
One of the projects next on the list for me is to build a pair of low-back dining chairs and a small (40" diameter) table for our breakfast area. With no kids around now, we find ourselves eating at a small table I made a while ago rather than the dining room set. The two side chairs from my office are just not the right chairs to eat on.
Maloof small table (mine will be round)

I have known for a while these would be a Maloof style; my rocking chair carving/building experience has shown me this is within my abilities.

I knew I would need some help on the design for this and have been looking for inspiration for a while. Last fall at WIA I took a close look at Charles Brock's chair in the flesh and while close to what I was after, I did not like the arm treatment. Scott Morrison's version was closer to what I was after, so I bought both sets of templates and decided to merge them into my own version.

Konrad Sauer's elegant design
I knew I wanted a flattish arm style similar to Konrad Sauer's (at right) and Scott's plans were the closest to this, so I used his templates and Charles' techniques - neither of these plans are detailed enough to build from unless you have some experience in this style of building - so be warned. The Hal Taylor plans and video are unprecedented in detail  - perhaps too far the other way but you will not be wanting for more information in Hal's videos - everything you need to know to build your first Maloof-style piece is there - I cannot recommend this approach strongly enough if you are not going to attend a class.

I also bought Scott Morrison's templates and video for the table. Again, Scott's video and templates are very short on details and dimensions forcing one to do a lot of thinking around the build - I would have expected a lot more. The video is sexy with its CGI graphics and animation, but you cannot build your first table from this template and video without lots of help.


On with the build!

With the design work mostly done...

The flitch of 8/4 Walnut I made Courtney's bench from was bought primarily for this purpose. So time to get to work! Below are a few picture of work to date on the build.

Gluing up a pair of seat blanks, there were a few small checks, I filled them with stained epoxy to start.
Later I will cut the worst of it out and make sure it will be carved away in the final seat to ensure I have
a stable seat.


Gluing up the top in stages to avoid a catastrophic mistake.
Cleaning up the seat blank to make it lie flat for joinery - it  is 1-3/4" thick at this point and the thickest part
will likely end up just north of 1-5/8".

All the joinery marked out on the seat blanks. The happy faces are the lines I will drill on the set a depth reference for my carving. The legs joints are marked out as well.

All the legs rough cut and labeled with the joinery routed on the seats ready for the joinery on the legs to be cut.

Organization is key!
Back to the shop to cut some leg joints.