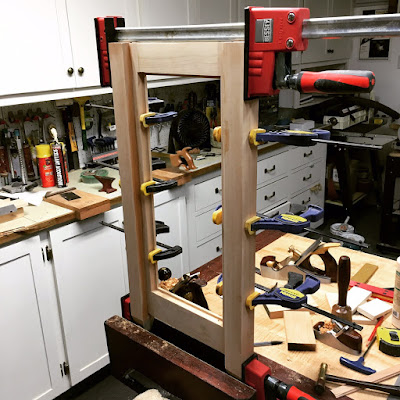
 Like many of my woodworking compatriots I have adopted the use of Instagram to share the happenings in my shop. As a result my blog posts have diminished. I am determined to keep this running log of major activities, so this will serve as a an update on what I have been up to.
Click on any of the pictures to see them a bit bigger.
The end of 2015 brought to a closure my foray into the luthierie, I sold all my guitar making tools, jigs, plans, hardware, and bits to a friend who is starting up his own guitar shop in Dartmouth; I hope this gives him the head start he needs. He will also finish up a few projects I never completed which will close the door on this part of my woodworking experience. Having made 10 guitars and mandolins over a few years was both eye-opening and very rewarding. Nothing will take your woodworking to a level of precision like the technical demands of building a guitar. My archtop guitar remains the project I am most proud of to date - I will have to work pretty hard to surpass that accomplishment. BTW - I have kept all my premium wood sets, so if you are looking to build a guitar or two, come see me...
The off-time during Christmas was consumed with some painting around the house, and the pumpkin orange in the hallway has been muted to a cream off-white. Your retinas will thank you.
Update on Christmas build...
 |
| How do you do siding in bird-scale? Tilted dado blade and voila! |
 |
| The finished birdhouse "in the white" |
 |
| The finished bird condo, after receiving the full Kim treatment - awesome! |
Shop Clean-up and some turning:
 |
| We needed some cutting boards she said... |
 |
| Is this enough already? |
As you see I have been working through lots of pieces of material, although it does not appear to have made much of a dent.
I will have to re-dedicate myself in the coming months to this purpose - fail, I shall not...
 |
| This piece of punky apple came from Yarmouth in 1999! |
 |
| This round piece of Maple had 1996 written on the edge - c'mon man! |
Another project from the material stores...
I have also been busy on a piece of furniture - this time for us. We wanted a sideboard for the dining area to replace a shelf that mysteriously disappeared after my youngest son bought his new house. I am not saying anything in particular here - the timing definitely was a coincidence.
 |
| The money shot - cherry and ash sideboard in its new home. Size: 48" w x 16" d x 30" h |
Those not interested in woodworking techniques and the man glitter that we all know sawdust is - click away now.
 |
| The end frames are glued up and make extensive use of dominoes for easy joinery. |
 |
| The ash end panel looks like separate boards, but I chamfered the edges before gluing them up. Expansion s[ace was left on the edges behind the strips holding them in place. |
 |
| The back is designed with individual cherry slats shiplapped and screwed to the back. I wanted a finished look in case this became a free-standing piece. And yes the screws are clocked!! |
 |
| This unit has a couple of drawers and of course I am going to dovetail them. I don't dovetail all the time - but when I do, I use the David Barron jig! :-) |
 |
| All glued up with a coat of oil to seal. |
 |
| Another shot with the drawer open and shelf installed. We chose the clean drawer front look without hardware. drawers have a centre glide hidden underneath. |

