 |
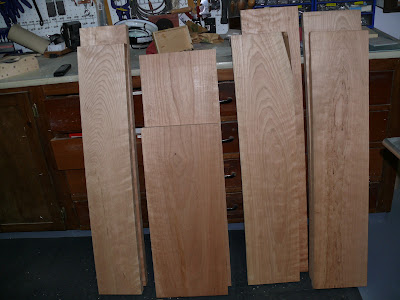
| Nice selecion of cherry with chair seats hidden insde |
With the chair prototype complete, it was time to mill up the lumber for the seat, legs and spindles. I bought some nice 2” cherry from Halifax Hardwood and let it acclimatize in the shop for a week before touching it. While it was getting comfortable in its new home, I milled up the ash which would become the legs and back spindles.
Since I am making 7 chairs, that’s 63 spindles and 28 legs, sure to challenge my attention span to complete, but I have the right attitude about the amount of time it will take and will ensure I have lots of projects to distract me and fill in those voids when I am ready to slit my wrists from hours (days) of turning. I am avoiding my natural tendency to rush to complete something which inevitably disappoints – telling folks this will take a few months helps me to avoid rushing.
 |
| Cherry Seat glue-up. |
With all the ash milling complete it was time to tackle the
cherry. I took more time grain and colour matching for each seat than I ever
have done on a non-guitar project. Using my new Sauer Panel plane as a jointer
plane to clean up machine marks made the tightest joint lines I have ever had.
Each seat blank was carefully aligned and glued up in the clamps for a day
each, ensuring no weakness whatsoever would be introduced into the glue joints.
This was one week of one seat blank per day. During this time I was starting
the production line setup to turn the spindles. Using the tenon cutter I put a
¾” diameter tenon on one end and a ½” tenon on the other end of 70 spindles. I
made a few extra to deal with the inevitable turning disasters and to improve
my colour matching potential later on.
Summary of work to date is all spindles tenon’d and about 50
turned round in prep for the final turning and tapering stage in the lathe.
Seat blanks all glued up and the crest rails all cut out rough.
 |
| Lots of work left to do |
I spent the morning yesterday making a jig for the seat’s
outside shape, smoothing the corner profiles, finalizing the leg tenon
locations and the spindle locations, which I have refined a bit to please the
eye more. I also built a jig to ensure the crest rails are all identical and
ease the final smoothing on the spindle sander with a guide wheel for the drill
press.
I cannot say enough
about the approach of building a prototype first, this allowed me to work out
design details and production details I could not have otherwise visualized.
Where possible I definitely will use this approach going forward. While
building the prototype I also built the drilling jigs for the spindle and leg
holes, using them to drill the holes for the prototype. This proved the jig
build and I expect the drilling phase to go quickly on the production chairs
when the time comes.
Back to the lathe.
No comments:
Post a Comment