 |
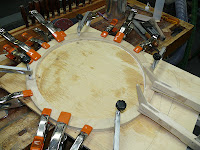
| A dozen legs with brackets installed ready for the final 3 chairs. |
 |
| Final group of Leminster chairs getting their "finish", just 3 more coats to go! |
This being my first foray into the dark world of chair construction
has been a rewarding one; my approach of building the prototype paid off in
spades, and he project was completed with minimal swearing involved – I said
minimal!
In addition to the chair project I have been cleaning up a
few things on the shop side which I have been working on for a bit. My dust
collector has always been a PITA to empty wi the plastic bags, and the dust,
cleaning the filter and carrying the plastic bag out to the woods for dumping.
Of course, knowing it was painful I always delayed until it was almost too full
to carry. Since I use my Busy Bee unit
for dust as well as shavings, the filter would often get clogged and the rotary
beater rarely did the job of cleaning it. So the suction gradually decreased to
the point where it was close to useless. Enter the cyclone...
 |
| Original unadulterated Busy Bee unit single 5" intake. Filter unit on top with rotary beater to clean filter (black handle thingy). |
I bought the Oneida add-on cyclone not knowing how I would
integrate into my setup, but ordered and bought from Busy Bee. When it arrived
I unpacked it and set it on the floor to stare at it for a few weeks until a
design came to me. This is how I work, I need to build it in my mind first
beforehand – I guess this is why I failed miserably on the Canada’s Handyman TV
show when I only had 2 hours to build a chair!
 |
| The added shelf on DC unit to hold can. |
 |
| Building a cover for the trashcan |
The greatest challenge was figuring out a way to easily empty
the dust bucket and to purchase something that would make it easy to do,
without a complete disassembly every time. I wandered around Princess Auto
looking for inspiration and settled on the galvanized garbage can you see in
the picture. This would be my chip collector, I built a removable top for it
that allowed me the bolt on the metal cyclone and attached it the can with
bungees. In order to minimize the footprint in my little cubbie I added a
platform for the can to sit on and also align the piping for the most efficient
setup. The outlet pipe from the cyclone (which goes into the DC unit) is
attached to the ceiling with more bungees; this allows me to remove the lid
from the can and empty it and it stays suspended in mid-air. This has worked
out well, since the cyclone itself weight 30-40 pounds.
 |
| The finished unit. single 5" input into cyclone on side with 6" feed from cyclone outlet (top) to intake on Dust Collection unit - money well spent! |
So how does it work? I have become hooked on using cyclones
after I bought the Oneida Dust Deputy for my Festool Dust Extractor (vacuum), I
use this for connection to my thickness sander, as well as my arsenal of
Festool sanders. The box on top collects the very very fine dust and keeps it
away from the filter bag and the HEPA filter, extending their life. I was
however floored when I went to clean out the unit the first time; the
collection box was pretty much full of fines that would have clogged anything
else before, but when I went to check/empty the bag it was 100% clean, not even
dusty!! And the HEAP filter like new, meaning the cyclone was removing pretty
much 100% of the dust from the airstream – wow!
 |
| Close shot cyclone showing ceiling support and green trashcan cover. |
Going back to the big DC I had high hopes for something
similar and I was not disappointed. The new unit has seen lots of work, both
with planing, chip collection at the lathe, as well as spindle (ugh) sanding
at the lathe (lots of dust). I have had to empty the galvanized bucket 3 or 4
times so far and a quick check inside the main DC unit shows the same as the
vacuum – nothing. The filter is clean, the bag is completely empty, it may be
years before I have to empty it, if ever; and the filter is not getting any
dust so suction remains pretty constant which is a nice aspect as well. I am
very pleased and wish I had done this years ago.
Now that my wall benches are no longer crowded with chair
parts it’s time to get back to some other projects which I have been deferring.
I have been asked to do a Festool video on the RO 125 for carving, I want to
review a couple of David Barron tools, finish my smoother plane kit, do some
“real” turning – well you get the idea.
Back to the basement...